I have been researching how to grow mushrooms for over a year now since I first heard about it in early 2015. I had the opportunity to go to the mushroom growing talk at Bonnaroo 2016.
Growing mushrooms consists of a few basic steps:
- Acquire mycelium culture
- Prepare a substrate… which can be cardboard, sawdust, coffee grounds, or hardwood. The preparation
- Keep shaded, in appropriate humidity and away from invasive organisms that would harm, alter, or destroy the mycelium as it grows
- Wait.
I’ve investigated a number of strains and methods and settled on what seems to be the simplest to get started using hardwood logs and a hardy strain of oyster mushrooms. It also requires the most patience as it takes over a year to see a result.
Looking at the math of what others were projecting I hope to see up to 10lbs per log per year, maybe more if I’m lucky. The logs should fruit for several years. But these are still unknowns, so stay tuned to learn as we do!
Preparing the logs depends on a few things.
- Getting the mycelium and letting it sit indoors to rebound from the potential strain of travel. The recommended amount of time was at least 1 week from the provider I chose.
- Cutting the trees. Depending on the type of tree there is a different amount of time to let the wood sit so the natural fungicide inside the tree has a chance to die off. I have a yard full of maple and gumball trees, which apparently need to sit about a week before inoculation.
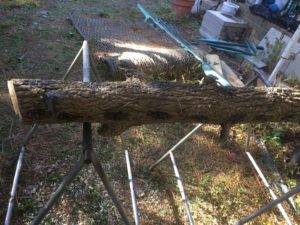
- The trees should be left whole (on the ground, or elevated on blocks) until you are ready to plug. This prevents other species from gaining a foothold while you are waiting to inoculate with your strain of mycelium.
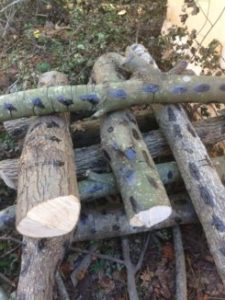
- The trees should be cut into logs between 4-8 inches in diameter, and drilled every 4″ in an offset pattern for every ring around the log you do.
- Handling the plugs requires using gloves and alcohol to prevent injecting unwanted bacteria to the plug.
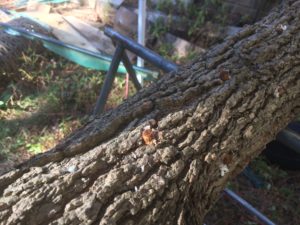
- Once you have plugged you need to wax the plugs so they have the best chance at colonizing the logs without external interference.
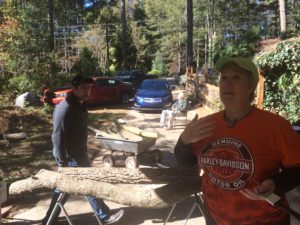
In a nutshell, that is the process we followed. Though while dropping the trees my wife thought it was less funny than I did when I explained there would likely be running involved in the process.
One quick note: Chainsaws are extremely dangerous. I have had them kick back on me and am very careful to keep a straight arm, wear a hard hat, gloves, and proper eye cover when using to avoid any accidents. These things are meant to cut through wood like butter… you can imagine what they would do to skin and bone. If you plan to cut your own logs please use every possible precaution… there is very little that is worth your limbs or life.
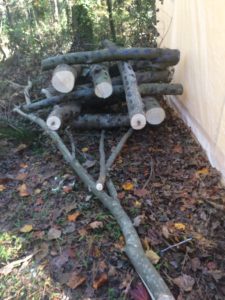
We cut the logs into 4 foot sections. Each one between 4 and 9 inches. I was surprised at the amount of trees we ended up needing to get the log count I was after. Originally, I had hoped to inoculate 14 logs, but we ended up with 11… partly because we didn’t have as much usable wood as I thought there would be, and partly because some of the plugs we were sent were moldy! More on that later…
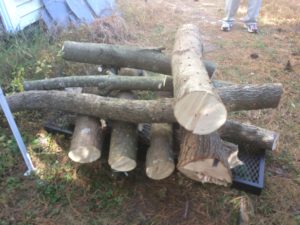
I went ahead and cut all the logs first instead of trying to mix the cutting, plugging, and waxing. It just seems like it would be exceptionally difficult to combine these tasks with any measure of efficiency. Perhaps if you had a 4 or more person team in a kind of assembly line. But as it was just my wife and myself (with some help in the morning cutting trees from our friend Chris!) we needed to make it more of an orderly process.
Another thing to note… each log requires approx 40-50 plugs. So a stack of 11 logs is going to require 450-600 plugs. (we used what few leftover plugs we had to plug one of the tree stumps to see how that does. I would have liked to do all three stumps, but 2 of my plug bags were moldy.)
My point is… make sure you have a really nice drill, and several bits in case you break 1 or more. We had 2, a makita 18v and dewalt 18v and several spare batteries which did the trick. I also picked up a corded hammer drill from harbor freight as a backup. The stack of 11 logs and stump wore out every battery I had.
Once the holes are drilled I put on the gloves, and coated the mallet, and gloves in alcohol so they would be free of contamination. We quickly adopted the process of my wife drilling the holes and me following behind with the plugs and popping them in the holes. This took a surprising amount of time. Cutting the trees into logs only took a couple hours, the drilling and plugging took most of the afternoon.

The next step was to wax all the holes. We used a hotplate which had a temperature dial we could program to keep from getting the wax too hot. The plate worked surprisingly well. We used a cheap brush I picked up from harbor freight to dip in the wax with the assumption we would never be able to use it again.
Once the logs were stacked I put them in a shady spot behind my tractor garage and covered the stack with 85% shade cloth because its going to get below freezing soon, and the shade cloth will act as a blanket to keep the stack warm while the mycelium has a chance to colonize the logs.
Now we wait! One more project down!